Top 10 beginner mistakes in hand embroidery

A realistic image of the tiny cross-stitch pattern stitched onto real beige aida fabric.


Welcome back to the Stop! Needlework Time community, where we believe every stitch is a step toward perfection! Whether you are a seasoned pro or just picked up your first embroidery hoop this morning, we all share one thing in common: the memory of those early, frustrating hurdles that made us want to put down the needle forever.

Today, I’m diving deep into a resource that I wish I had discovered years ago. I’m talking about the fantastic guide, "Top 10 beginner mistakes in hand embroidery," found over at Stitch Floral. If you’ve ever looked at your finished work and wondered why it doesn’t quite have that crisp, professional "pop," this article is about to become your new best friend.


Why Every Stitcher Needs a "Mistake Audit"

One of the most refreshing things about this resource is its incredibly encouraging tone. The author doesn’t just point out where you’re going wrong; they explain the why behind the physics of thread and fabric. It’s easy to get caught up in the excitement of a new project—perhaps while working through one of our Free Quilt Block Patterns—and rush the setup. However, this guide reminds us that the foundation of great needlework starts long before the first stitch is pulled.

The review covers technical nuances that often get overlooked in basic "how-to" videos. For instance, the guide dives into the common pitfall of material choice. Many beginners grab whatever fabric is lying around, but the author explains how the wrong weave can lead to distorted designs and endless frustration. It’s a vital lesson: your fabric is your canvas, and you deserve a solid one!

Tension, Thread, and the "Hidden" Side of Embroidery

Another standout section of the article addresses the "messy back" syndrome and the age-old controversy of knots. We’ve all been tempted to tie a quick knot and move on, but Stitch Floral explains how these tiny bumps can actually impact the final layout of your piece when it comes time to frame or finish it. If you are planning on incorporating your embroidery into larger projects, like our Intermediate Cross Stitch Designs, keeping a clean back is an essential habit to form early.

The guide also tackles the "too many strands" issue. It’s a classic beginner move to think that more thread equals faster coverage, but the resource beautifully illustrates how "less is more" when it comes to achieving that delicate, botanical detail we all love. By adjusting your thread count, you’re not just saving material; you’re elevating your art from "crafty" to "couture."

Elevating Your Technique for Longevity

What makes this resource a "must-read" for our family here is its focus on tension. If you’ve struggled with puckering—that annoying fabric gathering around your stitches—this guide provides the solution. It emphasizes the role of the embroidery hoop not just as a holder, but as a precision tool. Proper tension ensures that your work remains flat and professional, making it much easier to transition into our more advanced Needlework Tutorials later on.

By avoiding these ten common pitfalls, you’ll find that your stitching time becomes much more relaxing and therapeutic. No more unpicking hours of work because the fabric shifted or the thread tangled beyond repair!

Pro Tip: Bookmark this guide and revisit it every time you start a new project. It’s the perfect "checklist" to ensure your setup is flawless.

Final Thoughts

This guide from Stitch Floral is an essential bookmark for anyone looking to refine their craft. It’s thorough, beautifully explained, and focuses on the "small wins" that lead to professional-grade results. We love seeing our community grow in their skills, and resources like this are the stepping stones to mastery.

Have you fallen into any of these "beginner traps" lately? I know I’m still guilty of the occasional messy knot! Head over to the full resource at the link below and let us know in the comments which tip was your biggest "aha!" moment.

Read the full guide here: 10 Embroidery Beginner Blunders

Horse Head Cross Stitch Pattern – Equestrian Stitching Guide

Equestrian Cross Stitch Inspiration

A chestnut-and-white horse with a bright blue eye and blue halter takes center stage in this horse head cross stitch design. The portrait's rich brown shading, crisp white markings, and small tack details make it an appealing project for horse lovers. This guide explains what can be seen in the finished work, how to prepare for a horse portrait, and what we could verify about the original pattern source.

Horse head cross stitch portrait of a brown and white horse with a blue eye and blue halter stitched on light Aida fabric
Horse head cross stitch portrait shown in the original article. Design attribution and chart permissions have not been independently confirmed.

Horse Head Cross Stitch: Design Overview

ThemeHorse portrait / equestrian needlework
Visible detailsBrown-and-white coat, blue eye, blue halter, cream-colored stitched background
TechniqueCounted cross stitch, as shown in the image
FabricLight-colored even-grid embroidery fabric visible in the photo; exact count not verified
Thread colors and stitch countNot verified from an original chart
Suggested experienceIntermediate (editorial estimate based on blended-looking color changes and facial detail)
Credit stated in older post© ЗАО «Астрея», Москва (Astrea, Moscow); attribution not independently authenticated
Free chart licenseNot verified

What Makes This Horse Portrait Special?

The composition focuses on the horse's expression rather than a landscape. Darker brown stitches define the ears, mane and jaw; lighter chestnut shades give the muzzle and neck depth. White patches create strong contrast, while the blue eye and halter add small, distinctive accents.

A portrait like this works well as framed equestrian decor or a thoughtful gift for a rider or horse enthusiast. The most rewarding details are also the ones that demand the most careful counting: the eye, the edges of the white markings and the intersecting halter straps.

Materials to Prepare Before Stitching

  • A verified chart and color key: Obtain the designer's instructions from a legitimate source before choosing supplies.
  • Embroidery fabric: Select the recommended fabric count and color from the chart; the photograph alone cannot confirm them.
  • Embroidery floss: Label brown, tan, cream, white and blue shades according to the original key rather than guessing exact floss numbers.
  • Tapestry needle and hoop or frame: Match the needle to your fabric and keep the working area evenly supported.
  • Good lighting and a chart marker: These help distinguish neighboring brown shades and keep track of completed stitches.

Practical Tips for Stitching a Horse Portrait

  1. Study the chart legend. Confirm the thread symbols, strand counts, backstitch instructions and finished dimensions before cutting fabric.
  2. Organize similar browns. Separate chestnut, dark brown and tan floss on labeled cards so gradual shading stays consistent.
  3. Start with a recognizable section. The ear outline or large white marking can help you check your counting before moving into detailed color transitions.
  4. Check the eye carefully. Even a one-stitch shift can change the expression of a small animal portrait.
  5. Leave the finest halter details until the relevant surrounding stitches are secure. Follow the chart if it specifies backstitch or outlining.
  6. Finish according to material guidance. Test colorfastness where appropriate, press from the reverse side and frame without compressing the stitch texture.

Where to Find the Horse Head Pattern

This article links to the Caballos (35) horse cross stitch collection published on Gráficos Punto de Cruz Gratis by Angeles Porcel on May 4, 2013. The collection is accessible and presents multiple horse designs. The original Stop! Needlework Time article credited the pictured design to © ЗАО «Астрея», Москва (Astrea, Moscow). We have not independently confirmed that this particular chart is included in the collection or that its creator authorized free redistribution.

Visit the linked Caballos collection to browse its horse cross stitch charts. The collection is a third-party source rather than the confirmed official publisher of this specific horse portrait. Please check the chart and the creator's terms before downloading, sharing or reusing any pattern.

Browse Horse Cross Stitch Charts – Caballos →

Source: Gráficos Punto de Cruz Gratis, “Caballos (35)” (May 4, 2013). The page is accessible; licensing for the pictured chart remains unverified.

Frequently Asked Questions

Is the exact horse head cross stitch chart free?

We could not confirm an authorized free version of this particular design. The older article described it as free, but that description alone does not establish permission from the rights holder.

What fabric count should I use?

The original fabric count has not been verified. Use the count specified in a legitimate chart; changing fabric count changes the finished dimensions.

Is this a good beginner project?

It may be challenging for a first counted-cross-stitch project because the face uses close shades and small defining details. A simpler horse silhouette is usually easier for new stitchers.

Can I choose the floss colors from the photo?

You can use the photo for visual inspiration, but it is not a reliable substitute for the chart's color key. Screen colors and photography can shift shades significantly.

Design credit and rights: The original Stop! Needlework Time article attributed its image to © ЗАО «Астрея», Москва (Astrea, Moscow). The linked Caballos collection does not establish the pictured chart’s designer or redistribution license. The image and chart rights remain with their respective rights holders; this is an independent informational guide.

Winter Pansy Vase Cross Stitch – Free Floral Pattern Alternative

Floral cross stitch inspiration

The Winter Pansy Vase cross stitch design captures a cheerful arrangement of blue, violet, lavender and rosy-pink pansies in a warm terracotta flowerpot. This guide takes a closer look at the stitched piece, explains useful techniques for its layered petals and leaves, and points readers to the source linked by the original post.

Winter Pansy Vase cross stitch embroidery with blue, purple and pink pansies in a terracotta flowerpot on cream Aida cloth
Winter Pansy Vase — a colorful finished floral cross stitch piece.

Winter Pansy Vase: Design Overview

Design subjectPansy flowers in a terracotta-style pot
Visible colorsBlue, violet, lavender, pink, green and earthy brown
Technique visibleCounted cross stitch with detailed floral shading
Chart size / stitch countNot independently verified
Thread numbersUse the chart's own key; exact numbers not verified
Source in older articleGallery.ru image link (availability and rights unverified)

What Makes This Floral Design Appealing?

The pansies have soft, layered petals with dark centers and tiny pale highlights. Their contrasting blue and purple tones stand out against the warm pot and light stitched background. The scattered blossoms near the base of the pot add a relaxed, garden-inspired feel.

This kind of floral arrangement makes attractive framed needlework for a sewing room, cottage-style interior or handmade gift. The careful color transitions are especially satisfying for stitchers who enjoy botanical detail.

Materials to Prepare

  • Fabric: evenweave or Aida in a count suited to the actual chart and your stitching preference.
  • Floss: the precise brands, colors and quantities listed on the authorized chart's key.
  • Needle: a tapestry needle appropriate for the fabric count.
  • Other essentials: embroidery scissors, a hoop or frame if preferred, good light and a way to track completed symbols.

The photograph shows a stitched result, not a complete thread key or a reliably readable chart. Avoid choosing exact DMC numbers from the photo alone.

Practical Tips for Stitching Pansies

  1. Check the chart first. Confirm its stitch count, fabric recommendation and thread key before buying supplies.
  2. Keep the flower shades organized. Sort similar blues, violets and pinks into clearly labeled groups.
  3. Begin with a clear reference point. Mark the fabric center or work from a chart corner using a method you know well.
  4. Stitch related areas in manageable sections. Concentrate on one flower or leaf group at a time to avoid confusing close shades.
  5. Check the outline and highlights. Dark petal centers and tiny bright accents bring definition to the flowers; follow the original chart rather than guessing from the photograph.
  6. Finish gently. Follow the floss and fabric care instructions before washing, pressing or framing.

Where to Find the Winter Pansy Vase Pattern

The previous version of this article linked to an image hosted at Gallery.ru. During this review, that address did not load successfully, and we could not confirm the original chart designer or redistribution license. The link below is preserved as an archived reference, not a verified free pattern download.

Check the Original Gallery.ru Reference →

If the link is unavailable or does not contain a complete chart, please do not treat the finished-piece photograph as a substitute for the designer's instructions. We will update this section if a reliable authorized source is identified.

Free pattern from the original publisher

Try a Free Pansy Cross Stitch Pattern from DMC

If you love the flowers in the Winter Pansy Vase photograph but cannot obtain its original chart, DMC offers a different, officially free pansy cross stitch pattern. The DMC design is called Pansy (pattern PAT0885) and features a colorful bouquet that can be stitched as a decorative accent.

Important: The DMC chart is not the chart used to make the flowerpot picture above. Follow DMC's own PDF, supply list, and instructions when stitching its design.

Get the Free DMC Pansy Pattern →

You will be taken to DMC's official product page, where the pattern is listed as free. Supplies may be offered separately and availability may depend on your region. We do not rehost DMC's PDF.

Frequently Asked Questions

Is Winter Pansy Vase a verified free cross stitch pattern?

No authorized free download has been independently confirmed for this exact design. The historic link may be inaccessible.

Where can I find a free pansy cross stitch chart instead?

DMC offers the separate Pansy (PAT0885) cross stitch pattern for free on its official website. It is a floral alternative rather than a match for the pictured Winter Pansy Vase design.

Can I use any color of fabric?

A different fabric color will change the look of the finished piece. Check the chart for background coverage and use a small test before committing to a substitute fabric.

Are the DMC thread numbers available?

The exact thread list was not verified during this review. Use the designer's original legend if you obtain an authorized copy of the chart.

Is this suitable for beginners?

The color shading and layered petals may feel challenging to a new stitcher. A smaller floral chart can be useful practice before attempting a detailed bouquet.

Source and rights: The previous post credited a Gallery.ru-hosted image. The identity of the original chart designer and permission to reproduce or distribute the pattern have not been independently established. The design and chart remain the property of their respective rights holders.

Serenity Winter Free Cross Stitch Pattern

Free winter cross stitch pattern

Serenity Winter Freebie by Twin Peak Primitives brings together a snow-covered cottage, a quiet landscape and a bird perched near a bare tree. If you enjoy peaceful seasonal stitching, this is a charming project to explore. The pattern is offered as a free PDF through Atelier Soed Idee, with credit to Twin Peak Primitives.

Serenity Winter cross stitch design with a snowy cottage, bare winter tree, perched bird and falling snow
Serenity Winter Freebie cross stitch design, credited to Twin Peak Primitives. Image shown for identification; design rights belong to the creator.

Serenity Winter Cross Stitch: Pattern Overview

Pattern titleSerenity Winter Freebie
Designer / brandTwin Peak Primitives
ThemeWinter cottage, snow, bird and bare tree
Pattern formatPDF chart, available from the linked provider
AvailabilityListed as a free pattern (€0.00) by Atelier Soed Idee at the time of review
Stitch count / floss shadesRefer to the original PDF chart; not independently verified here
FabricChoose only after checking the chart's suggested fabric and stitch count

What Makes This Winter Design Special?

Unlike a busy holiday sampler, this design focuses on the stillness of winter. The cottage provides a warm focal point against the snow, while the tree and small bird bring character to the landscape. Contrasting light and dark stitches help define the roof, branches and snowy ground.

The finished piece could suit a winter-themed wall display or a seasonal gallery of stitched designs. For the most accurate result, use the original chart to choose thread colors and fabric rather than guessing from the photograph.

Materials and Preparation

  • Original chart: download the free PDF from the provider linked below.
  • Fabric: select Aida or evenweave in a count appropriate for the chart and your comfort level.
  • Threads: follow the color key in the PDF; check whether specific brands or substitutions are listed.
  • Tools: tapestry needle, embroidery scissors, a hoop or frame if preferred, and a way to organize floss.

Practical Tips for Stitching Serenity Winter

  1. Read the pattern key first. Check the chart's symbols, suggested fabric count and any backstitch instructions before starting.
  2. Plan the snow and background. Light thread on light fabric can be difficult to see, so work in good lighting and check your stitches frequently.
  3. Start with a clear landmark. The cottage roof or tree trunk can help you keep your place as you move into smaller details.
  4. Keep similar shades separated. Organize gray, beige and white threads so subtle changes in the winter scene remain visible.
  5. Count carefully around branches. Pause regularly and confirm the chart's grid before adding isolated stitches.
  6. Finish with care. Follow the thread and fabric manufacturers' instructions before washing, pressing or framing your work.

Where to Download the Free Serenity Winter Pattern

The original Stop! Needlework Time article linked to Atelier Soed Idee. Its Serenity Winter Freebie page identifies the design as a free pattern from Twin Peak Primitives and provides an attachment named Serenity.pdf. Open that page and look under Bijlagen (Attachments) for the chart.

Get the Free Serenity Winter PDF at Soed Idee →

The download is hosted by the external provider, not by Stop! Needlework Time. Availability and the provider's instructions may change.

Frequently Asked Questions

Is Serenity Winter really a free cross stitch pattern?

Atelier Soed Idee lists the design as a free Twin Peak Primitives pattern and provides a PDF attachment. Check the linked listing for the latest availability and any applicable terms.

Can I use any Aida fabric?

You can choose your preferred fabric count if you understand how it changes the finished dimensions. Verify the stitch count and recommended materials in the PDF first.

What is the best way to stitch the snowy areas?

Keep light floss shades labeled, use strong lighting, and check your chart after each small section. Working around clear landmarks can help reduce counting errors.

May I share or re-upload the PDF?

Free access does not necessarily grant redistribution rights. Link others to the provider or designer rather than uploading the PDF elsewhere.

Design credit and rights: Serenity Winter Freebie is credited to Twin Peak Primitives. The PDF is linked from Atelier Soed Idee, an independent provider. Pattern artwork, chart and instructions remain subject to their owners' rights and terms.

Queen of Flowers Cross Stitch Pattern – Rose Bouquet Guide

Floral cross stitch spotlight

Roses are often called the queen of flowers, and this counted cross stitch design celebrates them with deep-red blooms, pink highlights, green foliage, and a soft blue rectangular background. Explore the chart details, a verified DMC thread list, and practical tips before you start stitching.

Queen of Flowers cross stitch design with red and pink roses, green leaves, and a blue rectangular background on white Aida fabric
Queen of Flowers rose design. The original pattern file is linked below.

Queen of Flowers Cross Stitch: Pattern Overview

The linked PDF identifies the chart as Queen of flowers and supplies its stitch count, recommended fabric, DMC shades, and symbol key. Here are the practical details recorded in that file.

DesignQueen of Flowers — rose bouquet
Pattern file attributionCross-Stitch Club / Cross-Stitching.biz
Chart size120 × 173 stitches
Recommended fabricWhite 16-count Aida
Finished size on 16-count19.05 × 27.46 cm (7.5 × 10.8 in)
Finished size on 14-count21.77 × 31.39 cm
Finished size on 18-count16.93 × 24.41 cm
Floss palette19 DMC colors; two strands specified
PDF format18 pages, black-and-white symbols
Skill levelIntermediate (editorial estimate)

Finished dimensions describe the stitched design and do not include extra fabric for framing.

Why This Rose Design Stands Out

The contrast of crimson and rosy-pink petals against pale and deep blue helps the bouquet stand out. Dark green leaves give the composition depth, while the rectangular blue field creates a framed, vintage-style finish. The chart combines large blocks of color with smaller transitions in the petals and foliage.

Materials and Thread Preparation

  • Fabric: White 16-count Aida is specified in the PDF; 14- or 18-count can also be used if you adjust the finished dimensions.
  • Floss: The chart lists 19 DMC shades, including reds 666, 815, 817, 892 and 3801, greens 469, 470, 471, 935 and 3348, and blues 775, 930, 931, 932, 3752 and 3756. Refer to the PDF for the full symbol-to-color key.
  • Other supplies: Tapestry needle, embroidery hoop or frame, fabric scissors, and a thread organizer.
  • Working strands: The file specifies two strands for full cross stitches. Test a small area to confirm the coverage you prefer.

Practical Tips for Stitching the Roses

  1. Mark the chart center: Locate the central markings on the PDF and find the center of your fabric before stitching.
  2. Sort colors in advance: Label the shades carefully, especially the similar reds and neighboring blue tones.
  3. Work in manageable areas: Complete a small part of the background or a flower at a time, checking the symbols frequently.
  4. Keep stitches consistent: Make the top leg of every full cross stitch face the same direction.
  5. Use good lighting: Similar dark-green shades can be difficult to distinguish on a crowded chart.
  6. Plan the finish: Leave sufficient extra fabric for framing or mounting the completed design.

Where to Find the Queen of Flowers Chart

The earlier Stop! Needlework Time post linked to an 18-page PDF on Cross-Stitching.biz. The link was accessible at the time of review and contains a full symbol chart and thread key. We have not independently established the original artwork's licensing status, so please check the rights and permitted uses before downloading or redistributing it.

View the Queen of Flowers Pattern PDF →

External PDF hosted by Cross-Stitching.biz; availability and permissions may change.

Frequently Asked Questions

How many stitches is this pattern?

The published chart measures 120 stitches wide and 173 stitches high.

What fabric does the chart recommend?

The PDF specifies white 16-count Aida, but also gives finished measurements for 14- and 18-count fabric.

How many thread colors are needed?

The chart lists 19 DMC shades. Use its original legend to match each symbol to the correct floss.

Is this a beginner cross stitch pattern?

It is better suited to stitchers comfortable reading multi-page charts and sorting similar thread colors, although a patient beginner could work through it one section at a time.

Pattern source and rights: The linked PDF identifies Cross-Stitch Club / Cross-Stitching.biz and includes its own copyright notice. The original designer and redistribution permissions have not been independently verified. Please respect the rights holder's terms.

Tea Rose Cross Stitch Pattern – Floral Stitching Guide

Floral Cross Stitch Inspiration

Tea Rose brings together a vivid red rose, soft pink blossoms, delicate leaves and curling decorative details. This romantic floral cross stitch is full of subtle color changes and fine outlines. Below you will find the chart's documented size, fabric and DMC thread information, plus practical tips for stitching the design.

Tea Rose cross stitch design featuring a large red rose, pale pink flowers, fine outlined leaves and decorative swirls on cream fabric
Tea Rose floral cross stitch artwork. The linked chart is hosted by Cross-Stitching.biz; original design rights have not been independently verified.

Tea Rose Cross Stitch: Pattern Overview

Pattern nameTea rose
Design subjectRoses, floral motifs and ornamental scrollwork
Chart dimensions112 stitches wide × 144 stitches high
Fabric specifiedVintage Aida, 14-count
Finished stitched size on 14-count20.32 × 26.13 cm (approximately 8 × 10.29 in)
Finished stitched size on 16-count17.78 × 22.86 cm (approximately 7 × 9 in)
DMC shades listed26 shades, including Ecru
Techniques in the chartFull cross stitches and backstitches
PDF length5 pages
Chart hostCross-Stitching.biz
Original designer / reuse licenseNot independently confirmed

Measurements refer to the stitched area, not the extra fabric needed for mounting or framing. The values and thread count come from the chart's information page; the description of the artwork is based on the pictured design.

What Makes This Rose Design Special?

The central rose uses deep burgundy and bright crimson shades to create the appearance of layered petals. Smaller pale pink flowers and leaves soften the composition, while fine curved outlines give it a vintage botanical feel. The design combines filled-in cross stitches with backstitch detail, so the outlines play an important part in the finished result.

Materials and Preparation

  • Fabric: The chart specifies vintage 14-count Aida. If using a different count, recalculate the stitched dimensions before cutting.
  • Floss: Consult the PDF for the full 26-shade DMC key. Its symbol table specifies strand counts for different colors.
  • Needle and hoop: Use a tapestry needle suitable for your fabric and a hoop or frame that keeps the work comfortably supported.
  • Working copy: Keep the symbol key beside the chart, and mark completed areas on a personal working copy if permitted.

For example, the chart lists DMC 666, 815, 817 and 3801 among its reds. These are examples from the original key, not a replacement for the complete legend or its specified strand counts.

Practical Stitching Tips

  1. Prepare your fabric. Find and mark the center and leave extra fabric around all sides for finishing.
  2. Read the symbols first. Review the chart's floss legend and note that the PDF distinguishes full stitches from backstitches.
  3. Keep reds organized. Label similar shades separately so the dark petal contours do not get confused with the bright highlights.
  4. Work in manageable areas. Complete sections of the central rose or surrounding background while checking placement against the chart.
  5. Add outlines carefully. Work the backstitches according to the chart key; they define leaves, stems and decorative curves.
  6. Finish gently. Follow appropriate care guidance for your floss and fabric before pressing and framing.

Where to Find the Tea Rose Cross Stitch Chart

The older Stop! Needlework Time post linked to a five-page Tea rose PDF hosted at Cross-Stitching.biz. The file includes a symbol chart, fabric measurements and a DMC thread key. We are linking to the existing host rather than uploading a copy here.

View the Tea Rose PDF Chart →

Availability may change. The host and chart do not clearly establish the original designer's permission for free redistribution, so please check usage rights before copying or sharing the pattern.

Frequently Asked Questions

How large is the Tea Rose chart?

The chart is 112 × 144 stitches. On 14-count Aida, the listed stitched area is 20.32 × 26.13 cm, excluding framing allowance.

How many DMC colors does it use?

The PDF lists 26 shades, including Ecru, and provides separate full-stitch and backstitch keys.

Can I use 16-count Aida instead?

Yes, provided you follow the chart and use appropriate thread coverage. The listed stitched area on 16-count fabric is 17.78 × 22.86 cm.

Is this pattern suitable for beginners?

It may be challenging for complete beginners because the rose uses many close shades and the design includes backstitch details. Someone comfortable reading a cross stitch symbol chart may find it a satisfying next project.

Is the PDF confirmed to be an authorized free pattern?

No. The PDF is accessible on its current host, but the original designer and permission to redistribute it have not been independently established.

Source and pattern rights: This article references the Tea rose chart linked from the original post and hosted by Cross-Stitching.biz. The previous article credited the photograph to Needlecraft; that attribution has not been independently verified. The chart, original artwork and instructions remain the property of their respective rights holders.

Fairy Castle Cross Stitch Pattern – Free Chart & Stitching Guide

Fairy-tale cross stitch inspiration

Bring a storybook castle to life, one stitch at a time. Fairy Castle, credited to designer Lucie Heaton, features ornate towers with warm pink-red rooftops, moonlit clouds and a peaceful forest in shades of blue. This guide covers the project details, suggested supplies and practical tips for stitching its architectural features.

Fairy Castle cross stitch design with tall red-roofed towers, moonlit clouds, a blue winter forest and an ornate castle entrance
Fairy Castle counted cross stitch design, credited to Lucie Heaton. Image supplied from the existing Stop! Needlework Time article.

Fairy Castle Cross Stitch: Pattern Overview

Design nameFairy Castle
Designer creditLucie Heaton (as credited by the source)
Stitch count138 stitches wide × 164 stitches high
Fabric recommended14-count white Aida
Fabric cutApproximately 40 × 36 cm (16 × 14 in), as specified by the source; check orientation before cutting
Design sizeApproximately 25 × 30 cm (width × height) on 14-count Aida
ThreadsDMC stranded cotton and DMC Light Effects metallic thread, following the chart key
NeedleSize 24 tapestry needle
Experience levelIntermediate to advanced (editorial assessment)
Pattern listingCross-Stitching.biz — links to a chart hosted on pCloud

Measurements and materials are based on the linked pattern listing. Always check the chart key and fabric allowance before purchasing supplies.

What Makes This Castle Design Special?

The composition is dominated by tall turrets, narrow arched windows and a richly detailed entrance. The pink-red roofs stand out against the cool sky, while the moon and clouds add a soft fairytale atmosphere. Deep-blue forest shapes give the castle depth without competing with its architecture.

Because this is a substantial design, it can make an impressive framed piece for a reading nook, bedroom or creative workspace.

Materials and Preparation

  • Fabric: white 14-count Aida, following the source's fabric-cut recommendation.
  • Threads: DMC cotton floss and the metallic shades specified in the chart key.
  • Needle: size 24 tapestry needle, or an equivalent suited to your fabric.
  • Helpful tools: embroidery hoop or frame, embroidery scissors, floss organizer and a washable marking method suitable for your fabric.

Sort your floss by chart symbol before you start. Reserve metallic threads for the sections indicated in the instructions rather than guessing where they belong.

Practical Stitching Tips for Fairy Castle

  1. Find the center. Mark the fabric center and identify the corresponding chart point to keep the castle properly placed.
  2. Work in manageable sections. Choose a tower or background area and check your stitch count at regular intervals.
  3. Watch the roof outlines. Keep the edges of the narrow spires crisp by checking neighboring symbols carefully.
  4. Organize light and dark blues. The sky and forest use closely related shades; keep them labeled to avoid swapping colors.
  5. Handle metallic thread gently. Use shorter lengths and work with even tension to reduce fraying and improve the sparkle.
  6. Finish according to the chart. Complete outlines and decorative details at the stage recommended by the pattern instructions.

Where to Find the Fairy Castle Cross Stitch Chart

The pattern listing at Cross-Stitching.biz identifies Lucie Heaton as the designer and provides a download link for this castle chart. Visit the listing to review the available file and any applicable terms before downloading.

View the Fairy Castle Pattern Source →

The PDF is hosted by a third party. Availability and permission to redistribute it have not been independently confirmed by Stop! Needlework Time.

Frequently Asked Questions

Who designed Fairy Castle?

The linked pattern listing credits Lucie Heaton.

How many stitches is the design?

The listed chart measures 138 stitches wide and 164 stitches high.

What fabric should I use?

The source recommends 14-count white Aida. Changing the fabric count will change the stitched dimensions.

Does the design use metallic thread?

Yes. The source lists DMC Light Effects alongside stranded cotton for shimmering details.

Is this suitable for a first cross stitch project?

The large stitch count and fine architectural details make it a better choice for stitchers who already feel comfortable following a chart. Beginners may prefer to practice on a small motif first.

Designer credit and rights: Fairy Castle is credited to Lucie Heaton on the linked source page. Stop! Needlework Time is an independent guide and does not claim ownership of the chart or its artwork. Check with the original rights holder regarding permissions and redistribution.

Irises Cross Stitch Pattern – Purple Iris Stitching Guide

Floral cross stitch inspiration

Bring the beauty of irises to your stitching. This detailed floral design features lavender and violet petals, deeper purple shading, fresh green leaves, and a warm yellow-and-red center. Below, explore the design, calculate your fabric size, and find practical tips for stitching an iris motif with clean outlines and smooth color transitions.

Irises cross stitch embroidery with purple and lavender iris petals, a yellow-red flower center, and green leaves on light Aida fabric
Irises floral cross stitch artwork. Confirm the original chart and usage permissions with the source before starting or sharing the pattern.

Irises Cross Stitch: Pattern Overview

Design subjectPurple iris flowers with green leaves
TechniqueCounted cross stitch; check the actual chart for any additional stitches
Chart dimensions stated in the older post136 stitches wide × 173 stitches high
Fabric stated in the older postWhite 14-count Aida
Estimated stitched area on 14-count AidaApproximately 24.7 × 31.4 cm (9.7 × 12.4 in), based on the stated stitch count
Skill levelIntermediate suggested, given the layered petal shading
Old linked sourceCross-Stitching.biz (RAR archive; contents not independently verified)
Designer / chart permissionNot independently established

Fabric calculations describe the stitched area only. Add several inches of extra fabric on every side for framing or finishing. The stitch dimensions originate from the older article and should be checked against the actual chart before cutting fabric.

What Makes This Iris Design Beautiful?

The iris has distinct, ruffled petals, and this design uses a combination of lilac, violet, deep plum, and touches of warm color near the throat of the flower. The darker outlines help separate overlapping petals, while the leaves bring a natural contrast to the purple blooms.

Because the composition focuses on a single flower cluster, it could become a framed botanical picture, a cushion centerpiece, or part of a larger floral display—provided you have an appropriately licensed chart to stitch it.

Materials and Fabric Preparation

  • Aida fabric: The older description specifies white 14-count Aida. Use the chart's instructions if they differ.
  • Embroidery floss: Choose colors from the original chart's legend; exact DMC numbers have not been verified.
  • Tapestry needle: Select a blunt needle appropriate for your fabric count.
  • Hoop or frame: Keep the fabric evenly tensioned without stretching the weave.
  • Chart and organizer: Label floss and track completed sections, particularly where nearby purple shades look similar.

Practical Tips for Stitching Purple Irises

  1. Locate the chart center. Fold your fabric gently in half both ways to find the center, then match that point to the chart.
  2. Separate similar shades. Arrange lavender, violet, and dark purple floss in clearly labeled groups to avoid mixing petals and shadows.
  3. Work in manageable areas. Complete a section of one petal at a time, checking symbol changes frequently.
  4. Keep your top stitches consistent. Make the final diagonal of every cross stitch run in the same direction for a neater finish.
  5. Stitch the green leaves carefully. Watch for contrast between bright leaf highlights and deeper shaded veins.
  6. Finish according to the chart. If backstitch or other detailing appears on the verified chart, add it after the relevant cross stitches.

Where to Find the Irises Pattern Source

The older Stop! Needlework Time post linked to a RAR archive hosted on Cross-Stitching.biz. We preserve that link for reference, but we have not been able to inspect the archive contents, confirm the designer, or establish whether redistribution was authorized. The link may also be unavailable or require archive-extraction software.

View the Original Linked Irises Archive →

This is an external RAR file, not a verified official PDF download. Download or open files only when you trust the source, and check the chart's rights and instructions before use.

Frequently Asked Questions

How large is the design on 14-count Aida?

Using the 136 × 173 stitch count reported in the original post, the stitched area would be about 24.7 × 31.4 cm (9.7 × 12.4 in), before adding a finishing margin.

Is this a beginner-friendly iris cross stitch?

A stitcher comfortable reading charts and changing thread colors could enjoy it. The numerous subtle purple shades may be challenging for an absolute beginner.

Do I need specific DMC shades?

Follow the color key supplied with a legitimate copy of the chart. The exact floss numbers cannot be confirmed from the article image alone.

Can I download this chart for free?

The older article links to an archive described as a free pattern. We have not verified its contents or distribution permission, so we cannot guarantee that it is an authorized free chart.

Pattern source and rights: The original Stop! Needlework Time article linked to Cross-Stitching.biz. The chart's original designer and licensing status have not been verified. The artwork and chart, where protected, remain with their respective rights holders.

Beautiful Birds Cross Stitch Pattern – Spring Bird & Blossom Guide

Bird & Blossom Cross Stitch Inspiration

A delicate bird perched among pink blossoms makes a lovely subject for a spring-inspired needlework project. Explore the details in this Beautiful Birds cross stitch image, learn practical tips for stitching fine branches and petals, and find the magazine issue mentioned in the original post.

Beautiful Birds cross stitch showing a small brown songbird perched on flowering branches with pink blossoms and green leaves on cream Aida fabric
Beautiful Birds: a stitched songbird surrounded by soft pink blossoms. Image previously credited to Just CrossStitch in the original post; precise pattern attribution has not been independently verified.

Beautiful Birds Cross Stitch: Design Overview

ThemeSongbird, flowering branches, pink blossoms and green leaves
Technique visibleCross stitch with fine outlining details
Fabric shownLight-colored evenweave-style or Aida-like embroidery fabric; exact type and count not verified
Skill levelIntermediate suggested for the color changes and slender branches (editorial estimate)
Magazine mentionedJust CrossStitch, April 2023 issue
Exact chart size / floss listNot confirmed
Matching chart availabilityNot independently confirmed in the magazine

Why This Bird and Blossom Design Stands Out

The composition combines warm brown feathers, a tiny orange-brown beak, fresh green leaves and soft pink flowers. The open fabric around the branches keeps the scene light and airy rather than crowded.

One appealing detail is the contrast between the filled stitches in the bird and leaves and the slender lines of the twigs. That contrast makes careful outlining important, especially around the bird’s beak, feet and the smallest flower buds.

Materials to Prepare

Before beginning any bird-themed cross stitch project, check the actual chart for the required fabric count, embroidery floss, symbols and finishing instructions. The picture alone is not sufficient for calculating exact floss quantities.

  • Fabric: a suitable Aida or evenweave fabric in the count specified by your chosen chart.
  • Threads: the colors and quantities listed by the pattern designer; organize shades for the bird, blossoms, foliage and branches.
  • Needle: a blunt tapestry needle appropriate for the fabric count.
  • Other supplies: embroidery scissors, hoop or frame if preferred, and a chart marker or digital tracker.

Practical Tips for Stitching Birds and Blossoms

  1. Start with a clear chart. Confirm the fabric count and stitch symbols before choosing your materials.
  2. Separate close shades. Sort the soft pink flower colors and warm browns of the bird so nearby tones do not become confused.
  3. Work in manageable sections. Stitching one branch and its blossoms at a time can make the composition easier to follow.
  4. Check the direction of outlines. Follow the chart carefully around twigs, flower petals, the beak and other small features.
  5. Keep tension even. Consistent tension helps the petals and feather details stay neat without distorting the fabric.
  6. Finish gently. Follow the thread and fabric manufacturers’ care advice before washing, pressing or framing.

Where to Explore the Beautiful Birds Magazine Issue

The older Stop! Needlework Time post refers readers to the April 2023 issue of Just CrossStitch. The issue is advertised with a Beautiful Birds feature covering bird-inspired cross stitch designs. However, we have not verified that the exact stitched piece pictured above appears in that issue or that its chart is included.

View Just CrossStitch – April 2023 Issue →

This link opens a third-party magazine listing. The back issue is a paid publication; availability and pricing may change.

Frequently Asked Questions

Is the pictured bird cross stitch pattern free?

We could not verify a licensed free download for the exact pictured design. The magazine linked above is a separate paid resource and should not be treated as a confirmed source of this specific chart.

What bird is shown?

The image shows a small brown songbird perched on a flowering branch. Its species cannot be identified reliably from this stylized embroidery alone.

What fabric should I use?

Use the fabric count recommended by the chart you select. The image shows light-colored embroidery fabric, but the exact fabric specification is not confirmed.

Is this a beginner cross stitch project?

The small shapes, subtle color differences and fine branch details may be easier for stitchers with some experience. Beginners can start with a simpler bird motif before attempting a more intricate piece.

Pattern credit & rights: The previous article credited the image to Just CrossStitch and linked to the magazine’s April 2023 issue. We have not independently confirmed the designer or exact chart attribution. Designs, charts and magazine materials belong to their respective rights holders; this independent guide does not reproduce a chart.

Purple Rose Bouquet Cross Stitch Pattern – Glamorous Rose Guide

Floral cross stitch spotlight

Purple Rose Bouquet Cross Stitch Pattern – Glamorous Rose Guide

With rich violet petals, deep green leaves, and a graceful scrollwork background, this elegant rose design has a romantic, decorative look. Below you'll find a closer look at the pattern image, helpful stitching advice, and the original source reference linked from the older Stop! Needlework Time post.

Purple Rose Bouquet with glamorous ornament background cross stitch design featuring violet roses, green leaves, and soft beige scrollwork on light fabric.
Purple rose bouquet cross stitch design on light fabric, featuring soft lilac and violet rose blooms with an ornamental backdrop.

Purple Rose Bouquet: Pattern Overview

Design themePurple rose bouquet with a glamorous ornament background
Main motifsThree rose blooms, rosebuds, green foliage, and decorative beige scrollwork
Source noted in the older postProm.ua
Chart branding visible on previewDIVO GOLKA
Code shown on chart previewПЛ-112
Pattern title shown on chart previewГламурные розы (translated: “Glamorous Roses”)
Suggested fabricLight neutral Aida or evenweave to keep the purple shades and beige ornament clear
Thread styleMultiple purple and lavender tones, several greens, and pale beige accents
Difficulty estimateIntermediate, based on shading, petal layering, and background ornament detail
Original designer / licenseNot independently verified from the source image alone

The older Stop! Needlework Time article cited Prom.ua. The chart preview image also shows the brand name DIVO GOLKA, the code ПЛ-112, and the title “Гламурные розы.”

What Makes This Rose Design Stand Out?

This pattern combines the softness of floral stitching with the refined feel of an ornamental background. The large central rose draws the eye first, while the smaller blooms and buds create balance across the design.

The purple palette gives the project a luxurious, slightly vintage look. It is a beautiful choice for stitchers who enjoy floral subjects but want something more decorative than a simple bouquet on a plain background.

Materials and Preparation

  • Fabric: Use a light-colored Aida or evenweave so the pale decorative swirls remain visible.
  • Threads: Sort purple shades from light to dark before you begin to avoid confusion in the rose petals.
  • Needles: A tapestry needle matched to your fabric count will help keep the stitches neat.
  • Organization: Label green shades carefully, since leaf colors often look similar in floral charts.

Practical Stitching Tips for Purple Roses

  1. Start with the main rose. The largest flower is the visual anchor and helps you establish the palette for the rest of the design.
  2. Work petals in color groups. Finish nearby shades together to keep transitions smooth and prevent thread mix-ups.
  3. Build the ornament background gradually. The pale scrolls can be harder to see, so stitch them in good light.
  4. Keep leaf direction consistent. Foliage looks better when stitches follow the natural direction of the leaves.
  5. Check contrast often. Step back from your work occasionally to make sure the dark purple outlines and light highlights stay balanced.
  6. Finish carefully. Press from the back with a protective cloth to preserve the texture of the stitched roses.

Where to Find the Source

The older blog post linked to a source on Prom.ua. During review, the linked image preview also displayed the chart branding DIVO GOLKA and the code ПЛ-112. We recommend using the source page as a reference rather than copying or redistributing chart files.

Purple Rose Bouquet Cross Stitch Pattern

If you later recover the original Prom.ua product page, you can replace the button above with that direct source link.

Frequently Asked Questions

Is this a beginner-friendly rose pattern?

It is better suited to confident beginners or intermediate stitchers because the petals rely on several close shades for depth and realism.

Why does the design look so elegant?

The combination of shaded purple roses and the soft ornamental background gives it a decorative, almost vintage tapestry feel.

Can I stitch it on darker fabric?

A very dark fabric would reduce the visibility of the pale beige ornament. A light neutral background is the safer choice.

What should I do if the source details are incomplete?

Treat the linked source as a reference, keep credit notes in place, and avoid redistributing the chart unless you can confirm permission.

Source and rights note: The older Stop! Needlework Time article credited Prom.ua, and the visible chart preview shows DIVO GOLKA, code ПЛ-112, and the title “Гламурные розы.” The original designer and redistribution rights were not independently confirmed during review. This article is an informational guide only.

Winter Pansies - Free Cross Stitch Pattern

Winter Pansies - Free Cross Stitch Pattern
The photo from Gallery.ru

Enjoy this free cross stitch pattern of winter pansies. These purple flowers will brighten up any project, whether it's a tote bag or a wall hanging. Download the printable pattern and start stitching now!

Winter Pansies Chart - Winter Pansies Key

Autumn Leaves - Free Cross Stitch Pattern


Autumn Leaves - Free Cross Stitch Pattern
Designed by © Amanda Gregory

Make a lovely cross stitch with this autumn leaf design, and admire these seasonal hues that are truly unique. The design was created by Amanda Gregory. This design is free to download and use for your own personal pleasure. Do not sell or share it for commercial purposes. Have fun with this wonderful piece of art and unleash your creativity!

Full Post: Autumn Leaves 

Hydrangea - Free Cross Stitch Pattern

Hydrangea - Free Cross Stitch Pattern
Designed by © Amanda Gregory

Make this hydrangea cross stitch with this free pattern by Amanda Gregory. You can download and use it for your own pleasure. Please do not sell or share it for profit. We hope you enjoy this beautiful design and have a great time stitching! You can choose between pink or mauve for the hydrangea colour.

Full Post: Hydrangea 

Winter Aconite - Free Cross Stitch Pattern

Winter Aconite - Free Cross Stitch Pattern
Designed by © Amanda Gregory

Create a stunning cross stitch piece with this Winter Aconite pattern, designed by Amanda Gregory. This pattern is free to download and use for your personal enjoyment. Do not sell or distribute it for commercial purposes. Enjoy this lovely artwork and have fun stitching!

Full Post: Winter Aconite

July Sweet Peas Free Cross Stitch Pattern

July Sweet Peas Free Cross Stitch Pattern
Designed by © Amanda Gregory

Enjoy stitching this lovely pattern of July sweet peas, created by Amanda Gregory. This free cross stitch pattern is for your personal use only and not for commercial purposes. Download it now and have fun with this beautiful artwork.

Full Post: Sweet Peas

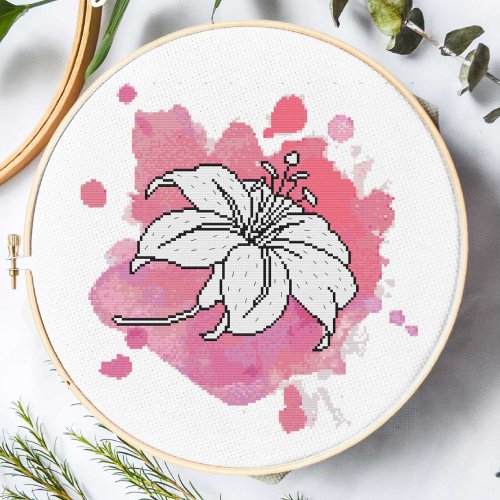
Lily on Watercolor - Free Cross Stitch Pattern

Lily on Watercolor - Free Cross Stitch Pattern
Designed by © Sarah Fogle

Lily on Watercolor Cross Stitch Pattern, a cross stitch pattern by Sarah Fogle, This pattern features a lily flower in a watercolor style with soft colors and blended stitches. It is a modern and artistic take on the traditional floral cross stitch. The pattern is suitable for intermediate stitchers who enjoy working with variegated floss and fractional stitches.

Full Post: Lily on Watercolor 

Floral Butterfly - Free Cross Stitch Pattern

Floral Butterfly - Free Cross Stitch Pattern
Designed by © Amanda Gregory

This pattern features a delicate butterfly with colorful floral wings. It is perfect for creating cards for various occasions, such as birthdays, thank you notes, or condolences. You can also stitch this butterfly as a gift for someone who loves nature and beauty. The pattern is easy to follow and suitable for beginners and experts alike.

Download Pattern: Butterfly beauty

Gladiolus - Free Cross Stitch Pattern

Gladiolus - Free Cross Stitch Pattern
Designed by © Ellen Maurer-Stroh

The gladiolus is the flower cross stitch I present to you today. It is a stunning flower that can be grown in gardens or cut for bouquets. It comes in many colours, such as white, yellow, orange, pink and red.

The name gladiolus means "little sword" in Latin. Some varieties are small and delicate, while others are tall and spiky. They symbolize strength and sincerity, as well as love at first sight. 

You can download the free pattern from the link below and enjoy stitching.

Download Pattern: Gladiolus 

Mini Pink Dogwood - Free Cross Stitch Pattern

Mini Pink Dogwood - Free Cross Stitch Pattern
The Photo by © Kathy Shaw

If you love dogwood flowers, you will enjoy this free cross stitch pattern. The pink dogwood version is easier to follow since it isn't white on white. You can get the free pattern from the link below and start stitching today.

Full Post: Dogwood 

Flowers Bouquets - Free Cross Stitch Pattern


Flowers Bouquets - Free Cross Stitch Pattern
Designed by © Maria Diaz
If you love flowers and cross stitch, you will enjoy these beautiful bouquets designed by Maria Diaz. Each one has a different color scheme and shape, and they are perfect for decorating your home or giving as gifts. You can download the free pattern at the link below and start stitching right away.

Download Pattern: Flowers Bouquets 

Discover More From the Archive

Discover cross stitch patterns, hand embroidery tutorials and needlework inspiration from our archive.

Finding needlework ideas from the archive…